
Before we get started, I’d like to point out that we will implement a more sophisticated A/B testing feature in the future. But you can do proper A/B testing today using events.
The feature mentioned above is called tag-based segmentation and now available to all Pirsch Plus customers! Check out this post for an updated version.
In this demo, we’re doing everything on the server-side, but you could also set it up in the browser using our JavaScript snippets.
The source code for this demo is available on GitHub.
Ordino - Your Dinosaur Shop!
We make every child’s dream come true. A dinosaur shop! Not really a shop because you can’t pay, but you know what I mean. Ordino is Italian and means ‘I order’, which I think is quite appropriate for a shop.
This is the home page.
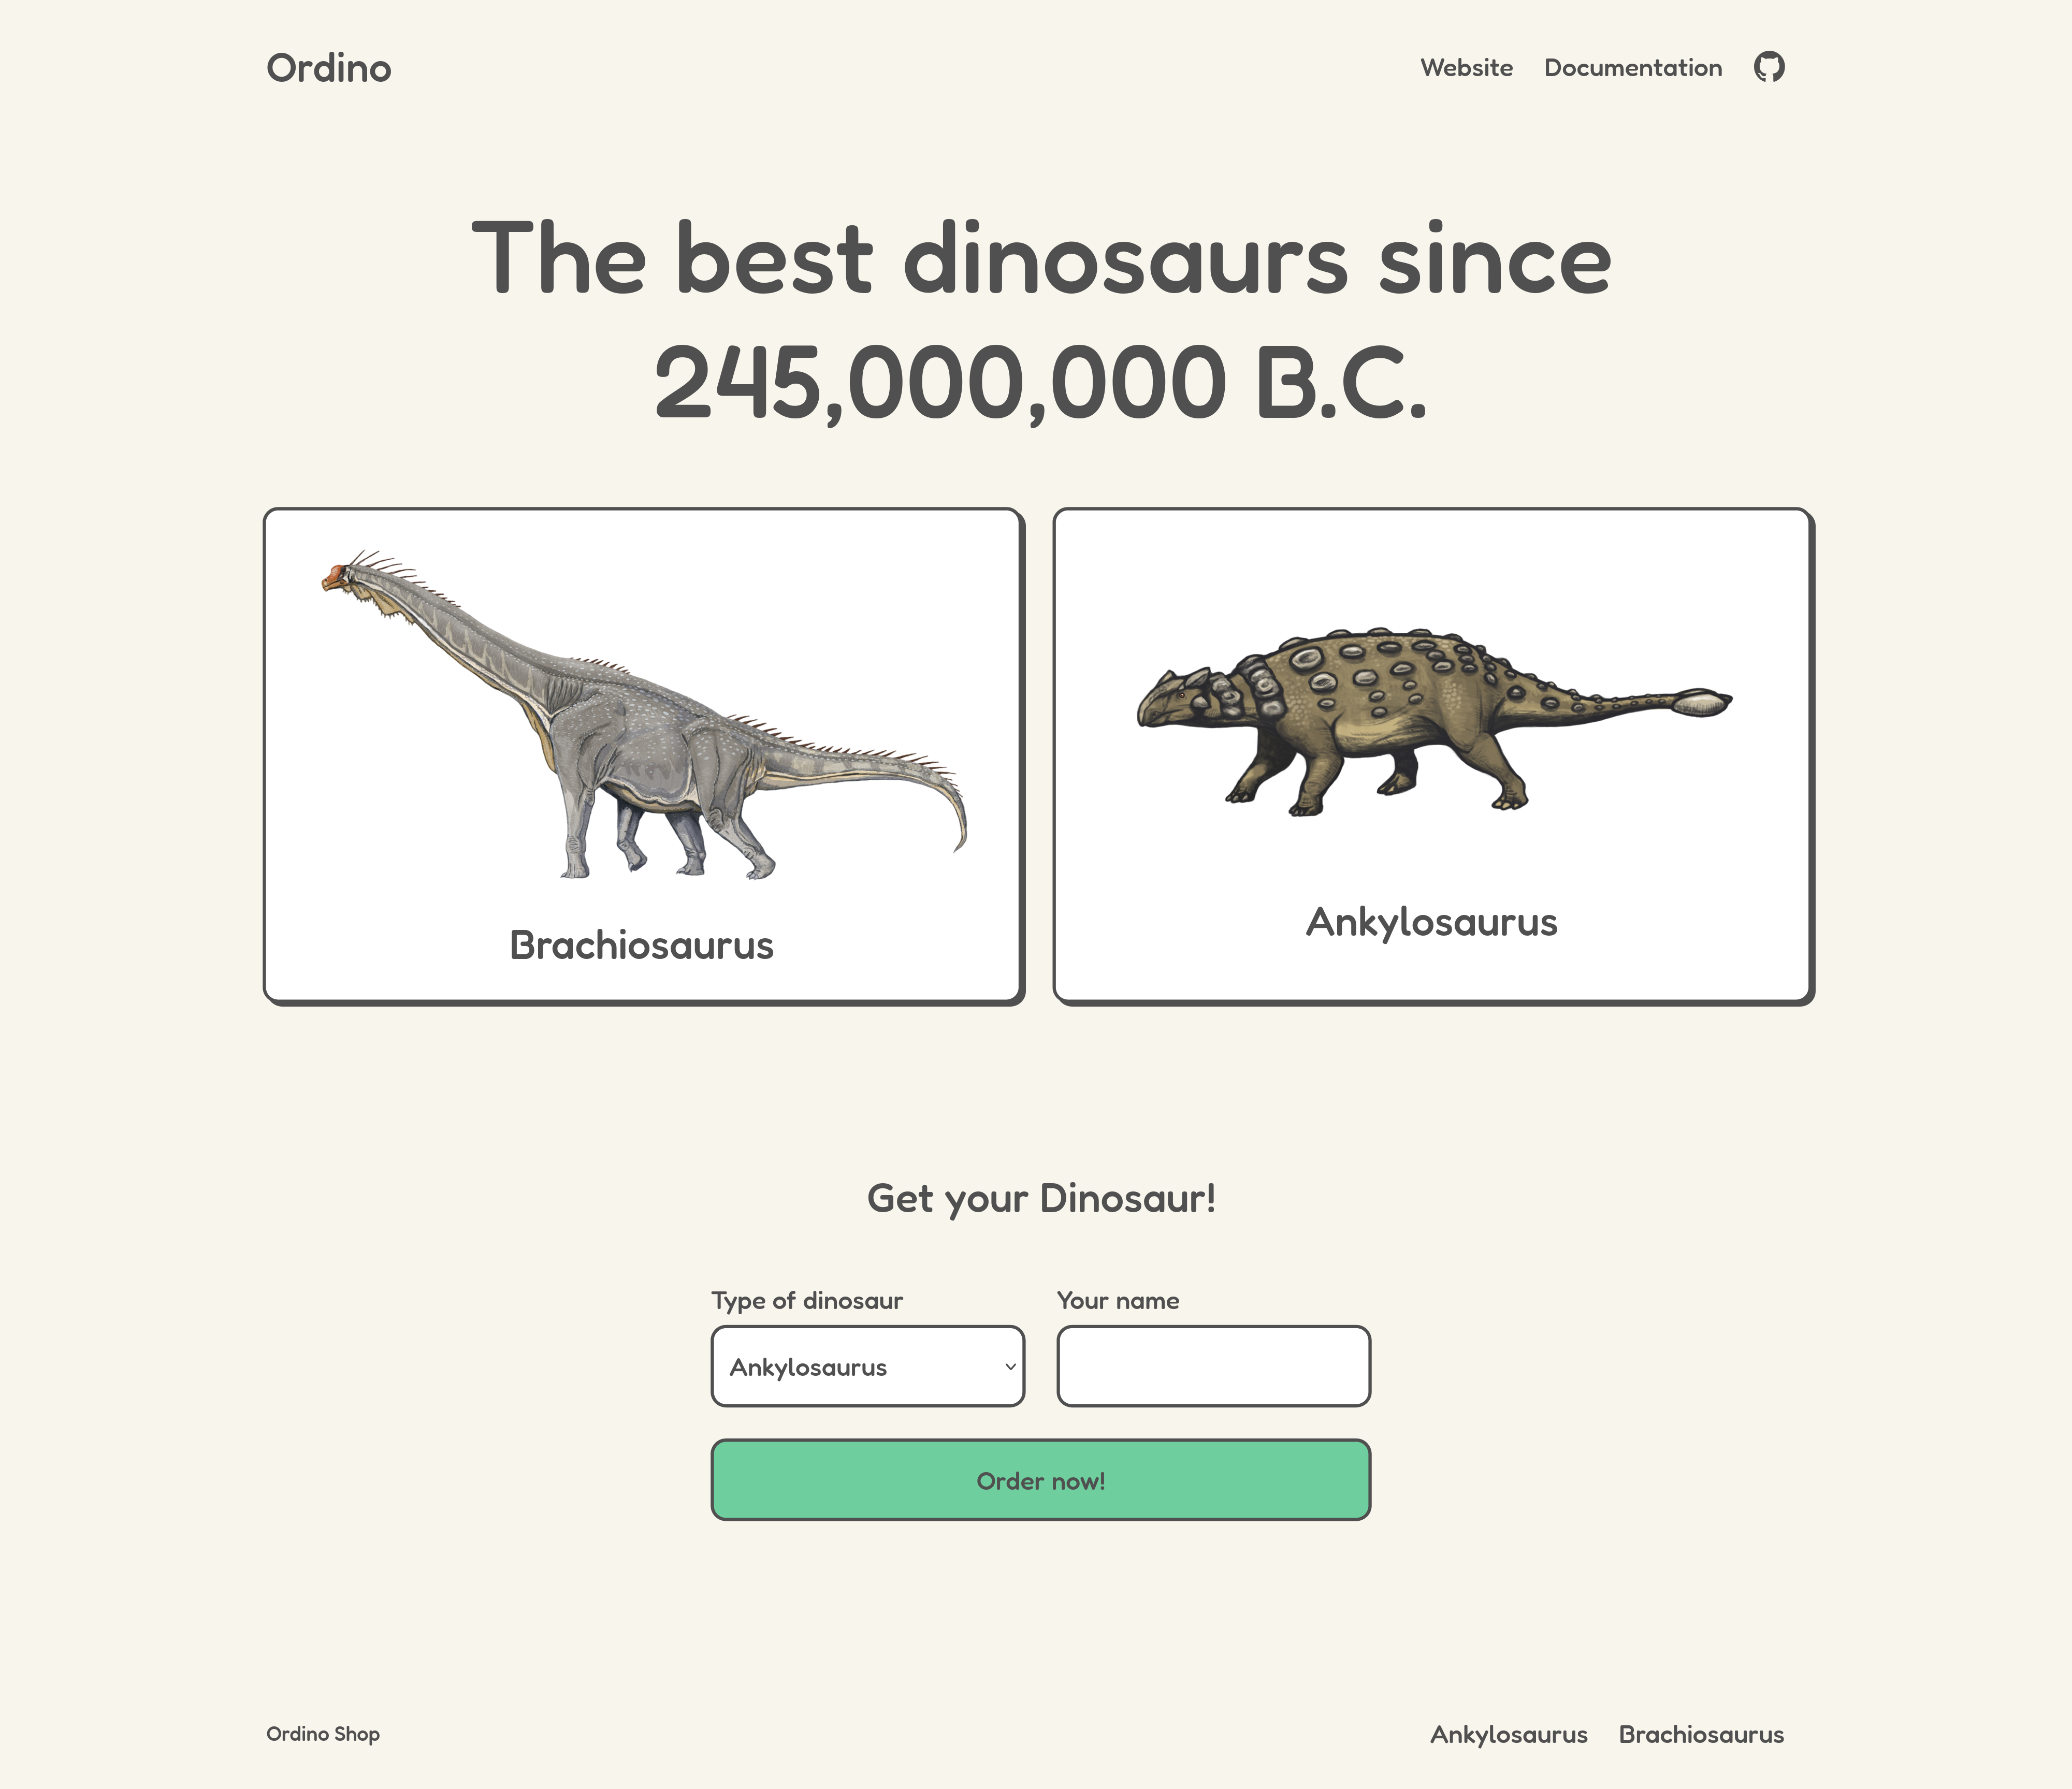
As you can see, there are two dinosaurs to choose from and a form to order one or the other. If you click on one of them, you’ll get a description and a larger picture. The form will pre-select the dinosaur you see on the details page.

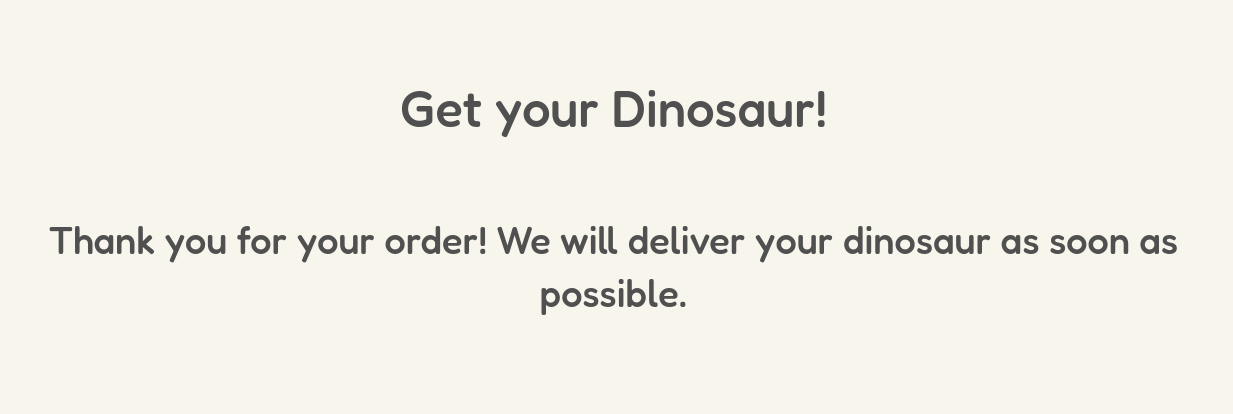
Once you’ve chosen and ordered your dinosaur, you’ll receive a confirmation.
So what do we care about here? Where is the A/B testing?
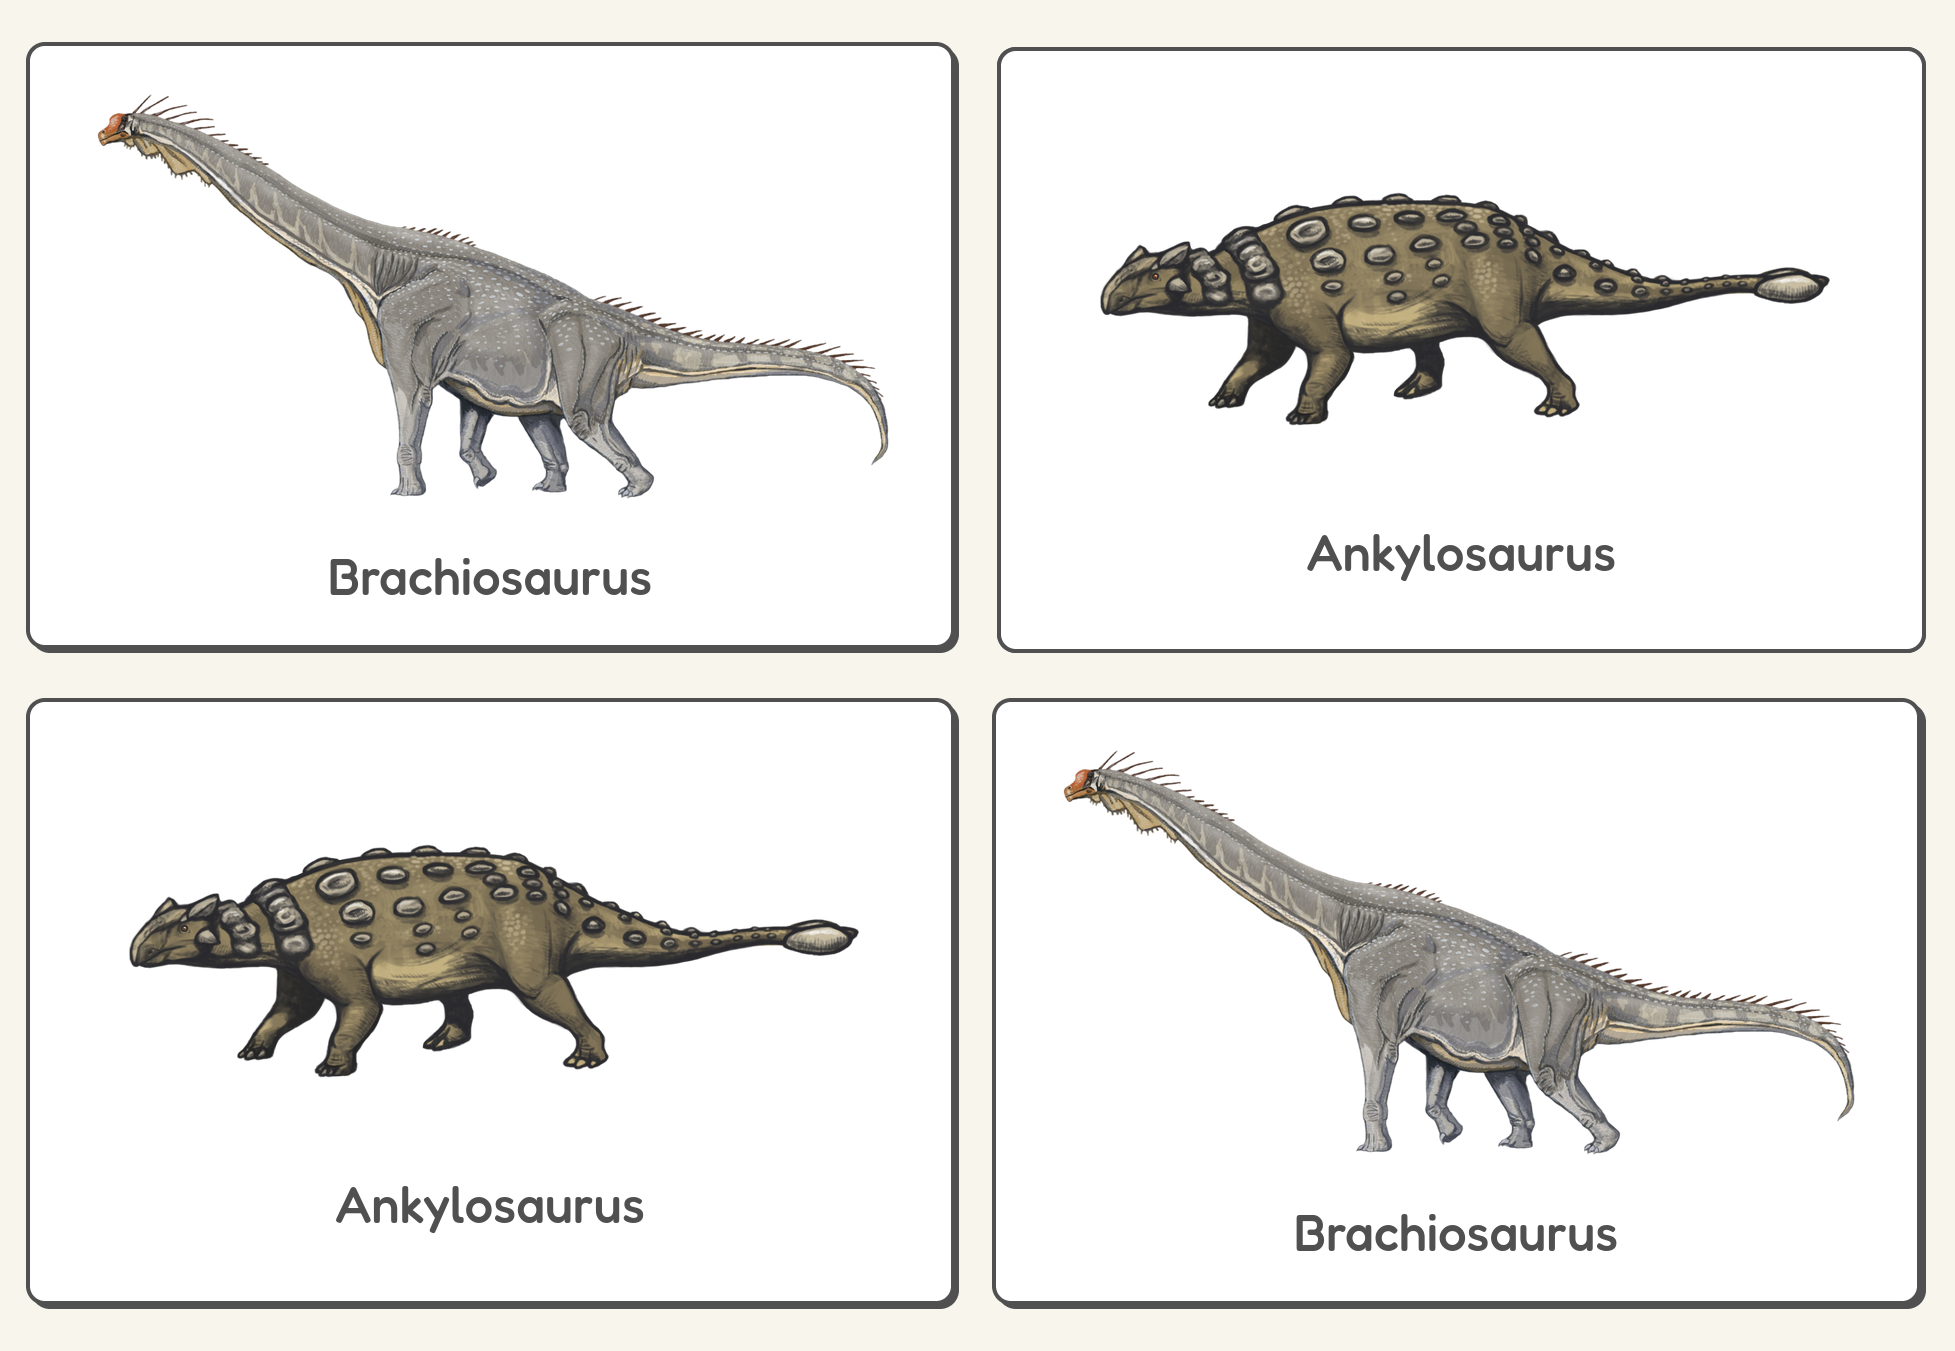
Well, because we do everything on the server, you can’t really see it on the website. On the first visit, we define which variants the visitor will see and keep showing them in the same way. There are no in-between changes during a session to not cause confusion.
We have four variations. The images on the home page can be swapped (A and B) and we have two titles for the order form (C and D).

Now, of course, we want to know which variations work best.
Analyzing the Results on the Dashboard
Let’s take a quick look at the dashboard.
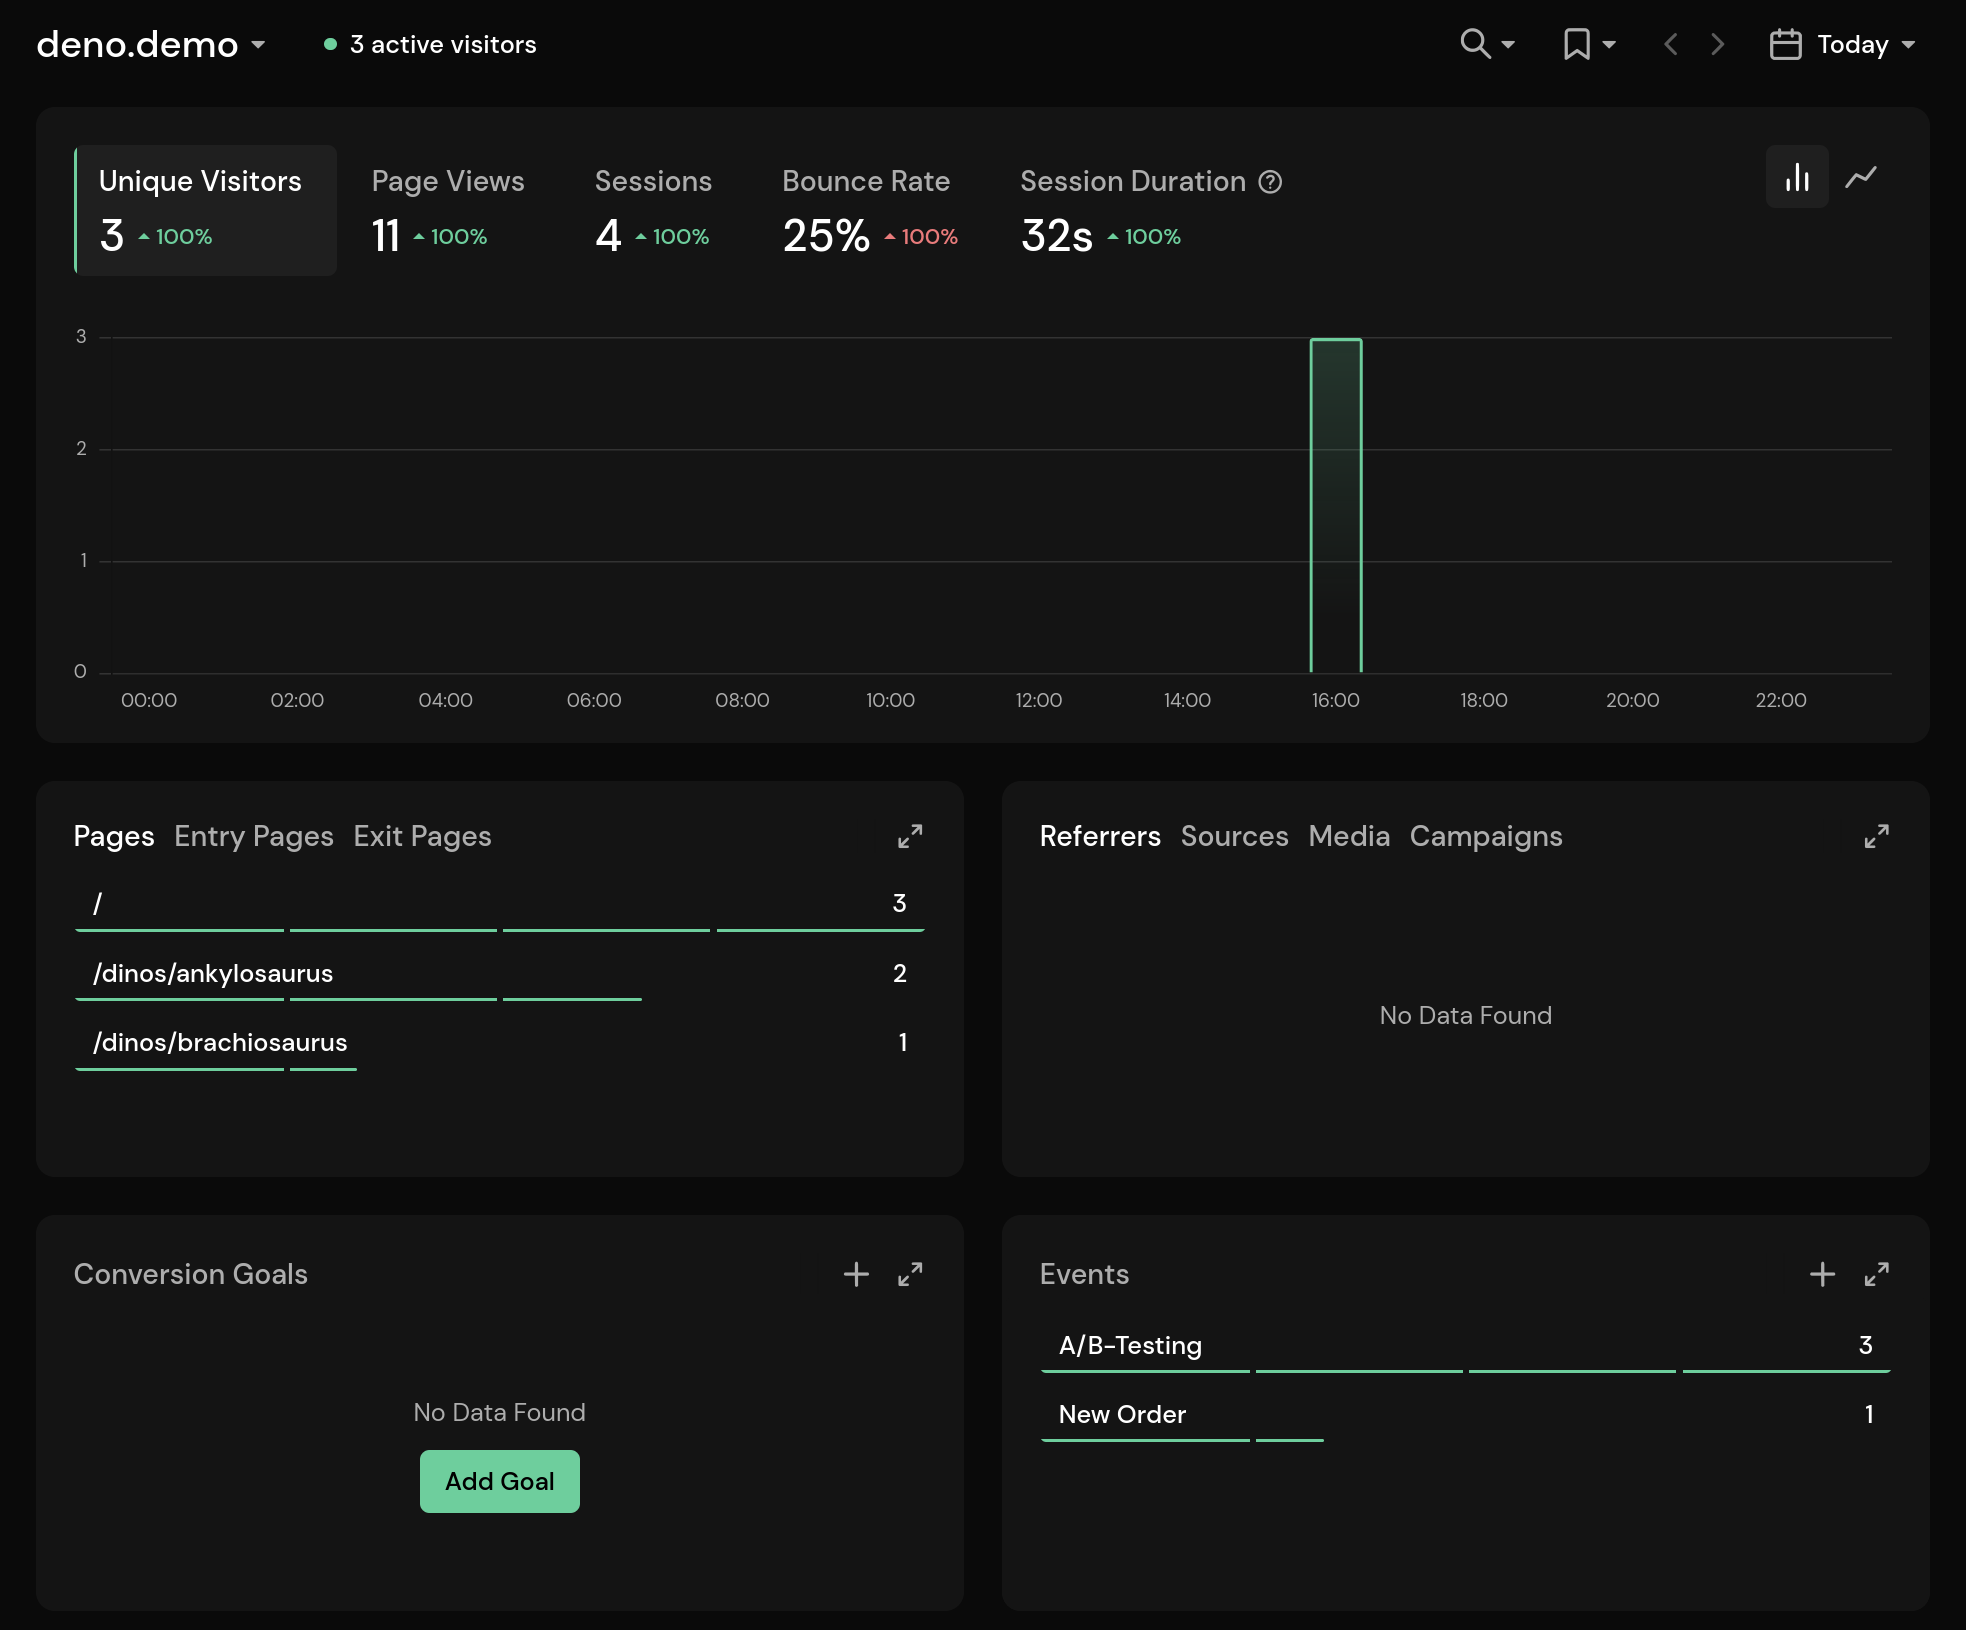
We had three visitors today. One of them placed an order, and the other two just browsed the website. Each of them created a single A/B-Testing event. The order was also tracked as an event.
Looking at the event metadata, we can see that we always displayed variant B for the dinosaur selection and variants C and D for the form headline.


The variant displayed is selected randomly. In this case, comparing variants A and B (order of detail page links) isn’t particularly useful, so let’s see what we can do with the form headline (variants C and D). Of course, you need a larger sample to make any decisions in the real world.
As we set the A/B-Testing event only once on the first page view, we can now click the variant we would like to filter the sessions upon. It’s important to note that we now only see results where the event with that particular metadata (!) was created during the session.
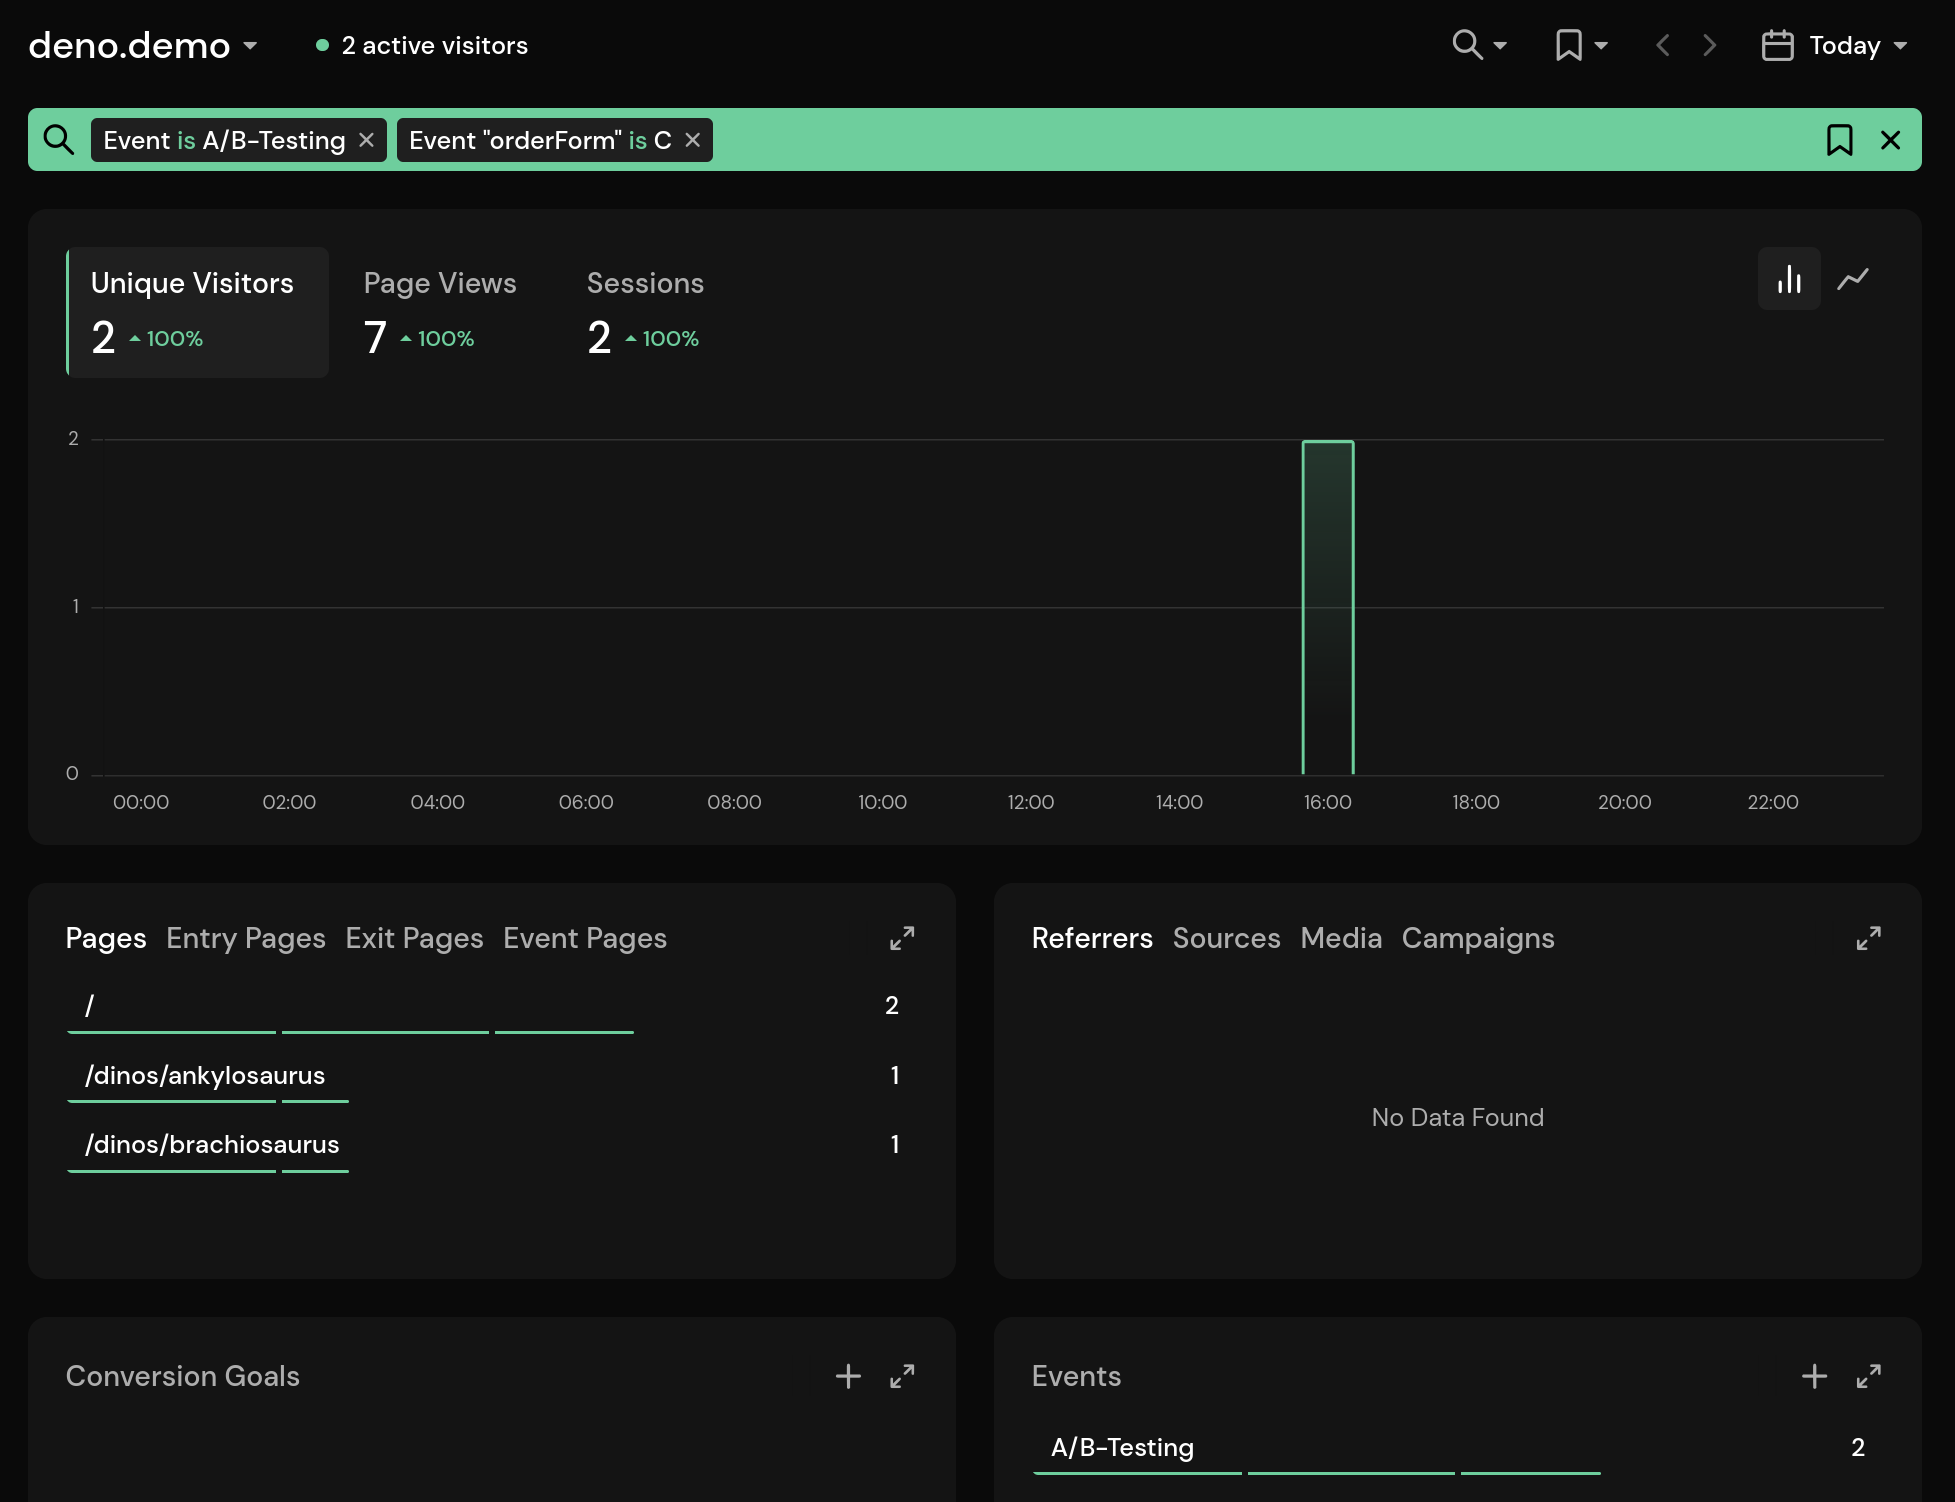
This returns all page views generated during the session. In this case, headline C didn’t lead to an order. The visitors just browsed the details pages and left.
If we now add the New Order event to the filter (from the lens selection) and switch to variant D, we can see that we received an order.
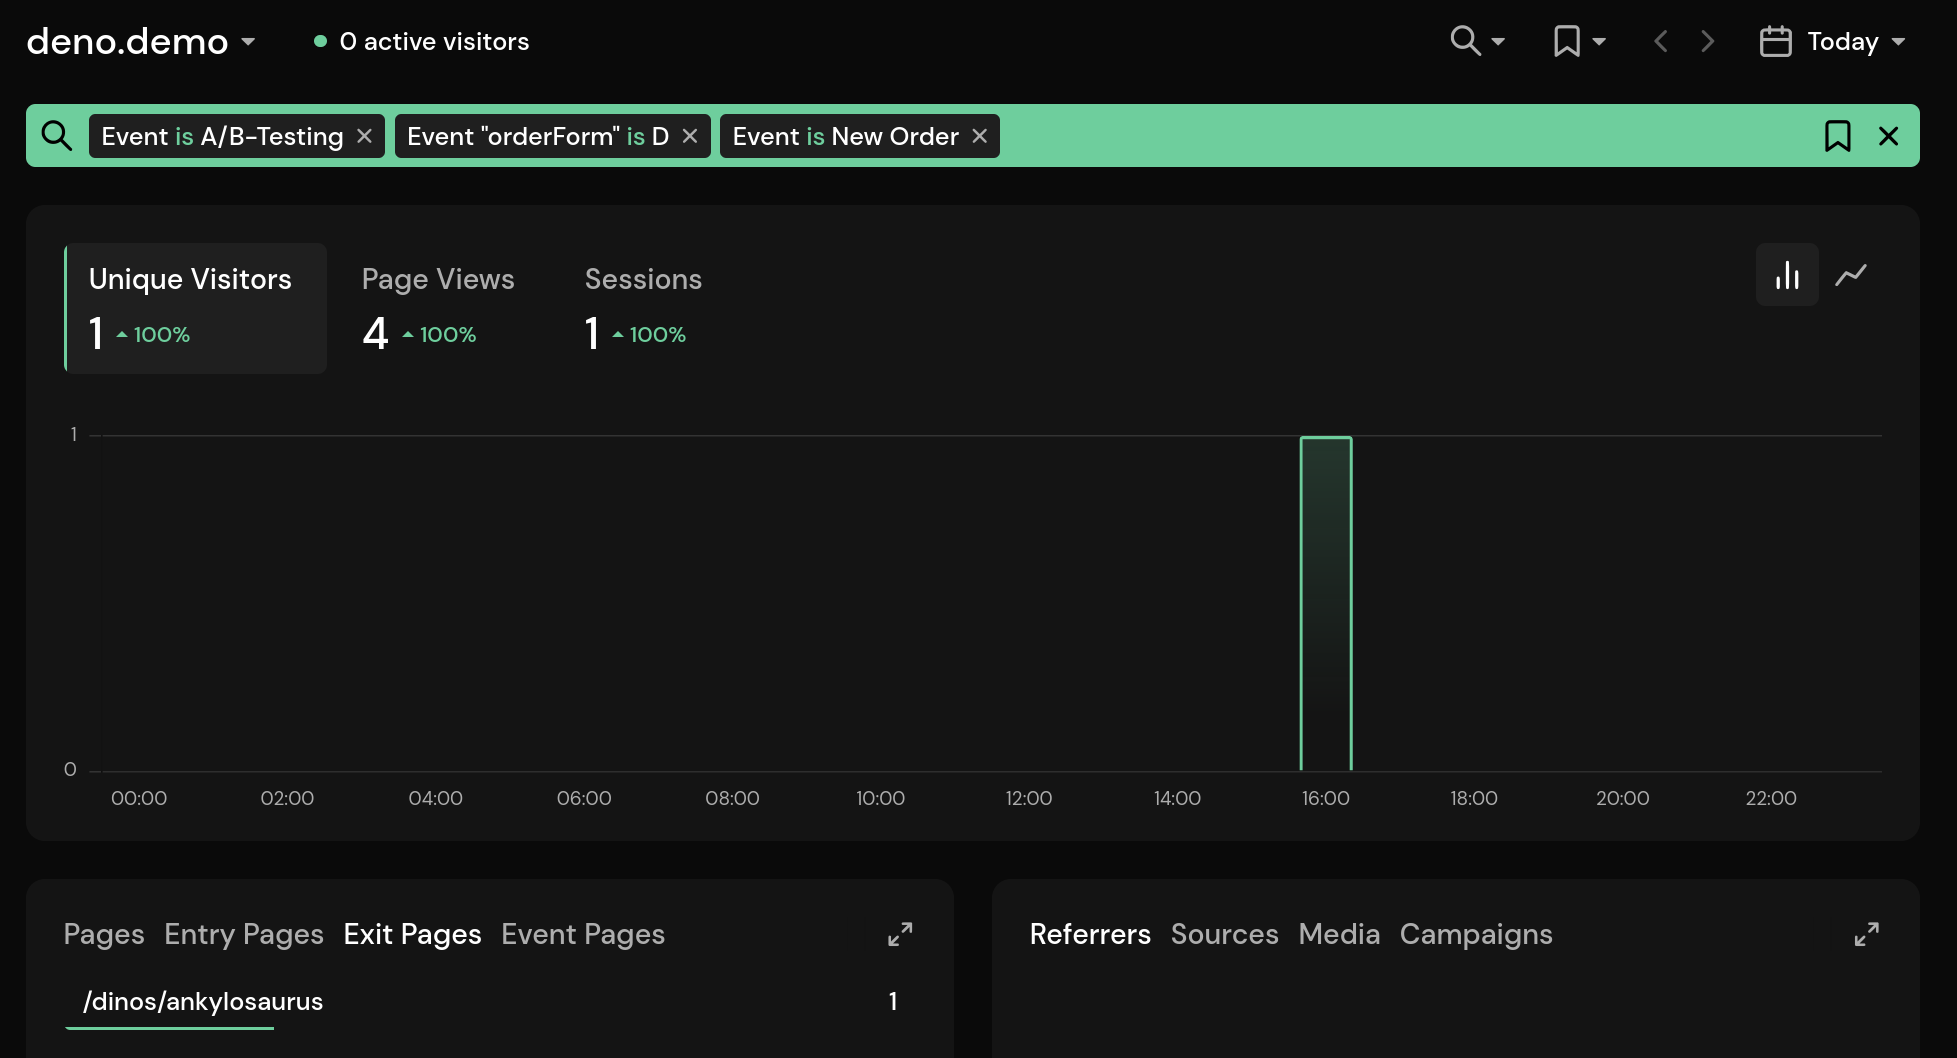
Two key takeaways from this are:
- Headline D (Get your Dinosaur!) is more effective at converting visitors to customers.
- The form works better on the details page (you can tell from the exit or event page panels).
There is more we could look into. For example, where the visitor came from, which browser or device was used, and so on. But this should be enough to give you a rough idea of how you could use it.
An easier way to analyze the results is by viewing the metadata for the order event, as we only create that when an order is placed.
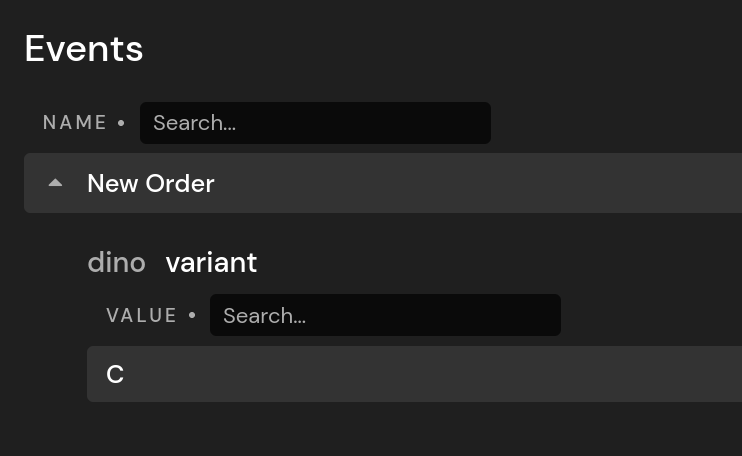
This will immediately tell you which headline was displayed when an order was placed. If we had more data, we could compare them side by side. Imagine having 10,000 visitors a day, and 3,000 of them placed an order when variant D was displayed, while only 500 placed an order with variant C.
The A/B-Testing event is more useful in cases where you would like to compare non-interactive elements on your page, like the order of the links or a different theme color.
Implementation
For the implementation, I’ll be using Deno and the Fresh framework. Deno supports TypeScript out of the box, so it’s a good fit for our TypeScript SDK available on npm.
I won’t cover all the details, just the parts that are specific to this demo, but I didn’t know Deno before. So, if you find anything that can be optimized, don’t hesitate to open an issue on GitHub.
Adding the Pirsch SDK
After setting up Deno and Fresh, we first need to initialize the Pirsch SDK. It is contained within its own module, allowing us to export two global functions, ‘pageView’ and ‘event,’ to track statistics.
// imports...
import { Pirsch } from "npm:pirsch-sdk";

const client = new Pirsch({
    hostname: config.pirsch.hostname,
    protocol: config.pirsch.protocol,
    accessToken: Deno.env.get("PIRSCH_TOKEN")
});

export function pageView(
    req: Request,
    ctx: MiddlewareHandlerContext
) {
    client.hit(client.hitFromRequest(toPirschRequest(req, ctx))).catch(e => {
        console.error("Error sending page view to Pirsch", e);
    });
}

export function event(
    req: Request,
    ctx: MiddlewareHandlerContext,
    name: string,
    meta?: Record<string, string>[],
    duration?: number
) {
    client.event(name, client.hitFromRequest(toPirschRequest(req, ctx)), duration, meta).catch(e => {
        console.error("Error sending event to Pirsch", e);
    });
}
The SDK is configured from the deno.json and .env files.
Something that doesn’t work out of the box currently is the hitFromRequest method. It will take a Node HTTP request as an argument and return all necessary data for the request to Pirsch. We need to map the Deno Request and MiddlewareHandlerContext to reconstruct the Node request object. I’ve added a simple mapping function for that.
function toPirschRequest(
    req: Request,
    ctx: MiddlewareHandlerContext
) {
    return {
        url: req.url,
        socket: {
            remoteAddress: ctx.remoteAddr.hostname
        },
        headers: {
            dnt: req.headers.get("dnt"),
            "user-agent": req.headers.get("user-agent"),
            "accept-language": req.headers.get("accept-language"),
            referer: req.headers.get("referer")
        }
    };
}
Errors will be logged, and the SDK takes care of the request handling. We’re using an access key in this case, so we don’t need a client ID and secret. Access keys can be created by adding a client with the access key type on the integration settings page.
Routing
Next, we’ll add three pages below the routes directory: the home page and two detail pages. One for the Ankylosaurus and one for the Brachiosaurus. They’ll all be using the same middleware to track page views.
// imports...
import { pageView } from "../analytics/pirsch.ts";

interface State {
    track: boolean;
}

export async function handler(
    req: Request,
    ctx: MiddlewareHandlerContext<State>
) {
    if (ctx.state.track) {
        pageView(req, ctx);
    }

    return resp;
}
As you can see, we’re using the context to determine if a page view should be tracked. This is necessary, as otherwise we would also track resources, like the favicon.ico requests, for example.
The track variable will be set in the page handlers. Here is an example for the home page in index.tsx.
export const handler: Handlers<any> = {
    async GET(req, ctx) {
        // track page views for this handler
        ctx.state.track = true;
        return await ctx.render({/* ... */});
    },
    // ...
};
That’s all you need to add Pirsch to your Deno backend. But of course we want to do a bit more than that.
Adding the Order Event
Before we take a look at the A/B-Testing event, I’ll cover the order event, as it is easier to set up. We just need a POST handler to handle the form submission on each page and trigger the event.
async POST(req, ctx) {
    try {
        await sendOrder(req, ctx);
        return ctx.render({/* success */});
    } catch (error) {
        return ctx.render({/* error */});
    }
}
sendOrder is reused accross multiple pages, so that’s why it resides inside the form component file.
export async function sendOrder(req, ctx) {
    const formData = await req.formData();
    const dino = formData.get("dino");
    const name = formData.get("name").trim();

    if (!name) {
        return Promise.reject("The name must not be empty!");
    } else {
        // log the order and send an event to Pirsch
        console.log("New order received", name, dino);
        event(req, ctx, "New Order", {dino, variant: ctx.state.orderVariant});
    }

    return Promise.resolve();
}
Of course, a real-world application would require a bit more logic. For privacy reasons, the event includes the variant and the dinosaur name but not the name of the customer.
Setting up A/B Testing
Alright, so now that we have basic page view tracking and an event for orders, how do we set the variants and create the A/B-Testing event?
This is what we would like to do:
- Randomly select the variants for the link order and headline.
- Store this information for the session so that we only set it up once for the visitor.
- Send an event to Pirsch so that we can analyze what was displayed during the session.
- Always display the same variants during a session.
A simple approach to this is to create a cookie with the variants we would like to display. The cookie only needs to stay valid for up to 24 hours (the maximum session life time in Pirsch) and we can check on each page view which variants to display. If it does not exist yet, we create it.
We change our middleware to include the setup and cookie extraction.
export async function handler(
    req: Request,
    ctx: MiddlewareHandlerContext<State>
) {
    // initialize A/B testing if required
    const abTest = initABTesting(req, ctx);

    if (abTest) {
        ctx.state.selectionVariant = abTest.variants["selection"];
        ctx.state.orderVariant = abTest.variants["orderForm"];
    } else {
        ctx.state.selectionVariant = getVariant(req, "selection");
        ctx.state.orderVariant = getVariant(req, "orderForm");
    }

    // render the page and append the cookie if required
    const resp = await ctx.next();

    if (abTest) {
        for (const [key, value] of abTest.headers.entries()) {
            resp.headers.append(key, value);
        }
    }

    // track the page view, just like before
    if (ctx.state.track) {
        pageView(req, ctx);
    }

    return resp;
}
initABTesting and getVariant are defined in analytics/ab-testing.ts. initABTesting will check for the cookie, create a new one, and send the Pirsch event if required. getVariant simply returns the variant for a key from the cookie. They are then made available by setting context variables (ctx.state.selectionVariant and ctx.state.orderVariant).
export function initABTesting(
    req: Request,
    ctx: MiddlewareHandlerContext
) {
    const cookie = getCookies(req.headers)["ab-testing"];

    if (!cookie) {
        const selection = Math.random() < 0.5 ? "A" : "B";
        const orderForm = Math.random() < 0.5 ? "C" : "D";
        const variants = {selection, orderForm};
        const expires = new Date();
        expires.setDate(expires.getDate() + 1);
        const headers = new Headers();

        // set cookie and send event
        setCookie(headers, {
            name: "ab-testing",
            value: `selection:${selection}|orderForm:${orderForm}`,
            expires,
            maxAge: 60*60*24,
            path: "/",
            httpOnly: true,
            sameSite: "Strict"
        });
        event(req, ctx, "A/B-Testing", variants);

        // return the variants
        return {variants, headers};
    }

    return null;
}
You can check your browser’s developer console to see which variants have been set by the server.
Here is an example of how you can use the variant from the cookie to display the form headline. The variant is communicated from the page to the ‘OrderDino’ component.
// routes/dinos/ankylosaurus.tsx

interface AnkylosaurusData extends OrderData {
    orderVariant?: string
}

export default function Ankylosaurus({data}: PageProps<AnkylosaurusData>) {
    const {orderVariant, success, error} = data;

    return (
        <>
            <Header title="Ankylosaurus" />
            <Menu />
            <main>
                <!-- ... -->
                <OrderDino variant={orderVariant} dino="Ankylosaurus" success={success} error={error} />
            </main>
            <Footer />
        </>
    );
}

// components/OrderDino.tsx

interface OrderDinoProps {
    variant?: string
    // ...
}

export function OrderDino(props: OrderDinoProps) {
    return (
        <>
            <h2>{props.variant === "C" ? "Order your Dinosaur today!" : "Get your Dinosaur!"}</h2>
            <!-- ... -->
        </>
    );
}
Conclusion
In this article, we covered:
- How you can do A/B testing using custom events.
- Analyze the effectiveness of variations on your dashboard.
- Set up tracking from your (Deno) backend.
- Create events from your backend to track conversions or whole sessions.
This demo is a bit more complicated than it usually needs to be, but I wanted to showcase a few ideas you might want to adapt for your own project, as there hasn’t been a complete server-side demo for Pirsch. For example, you can do all of the things presented here just by using our snippets in the browser. You don’t really need the global A/B testing event because tracking the variant driving a conversion is usually good enough.

